Online Documentation Settings
General Info
Integration with online help is available in any product by default, and leads to public hosting https://doc.ru.universe-data.ru /. A contextual link is available in each product section, which leads to instructions for working with the corresponding section.
To go to the documentation site:
Go to the required section. For example, in Duplicates.
Hover the cursor over the right edge of the screen: the red stripe (Figure 1).
Wait until the strip changes to a button (Figure 2).
Push Help button.
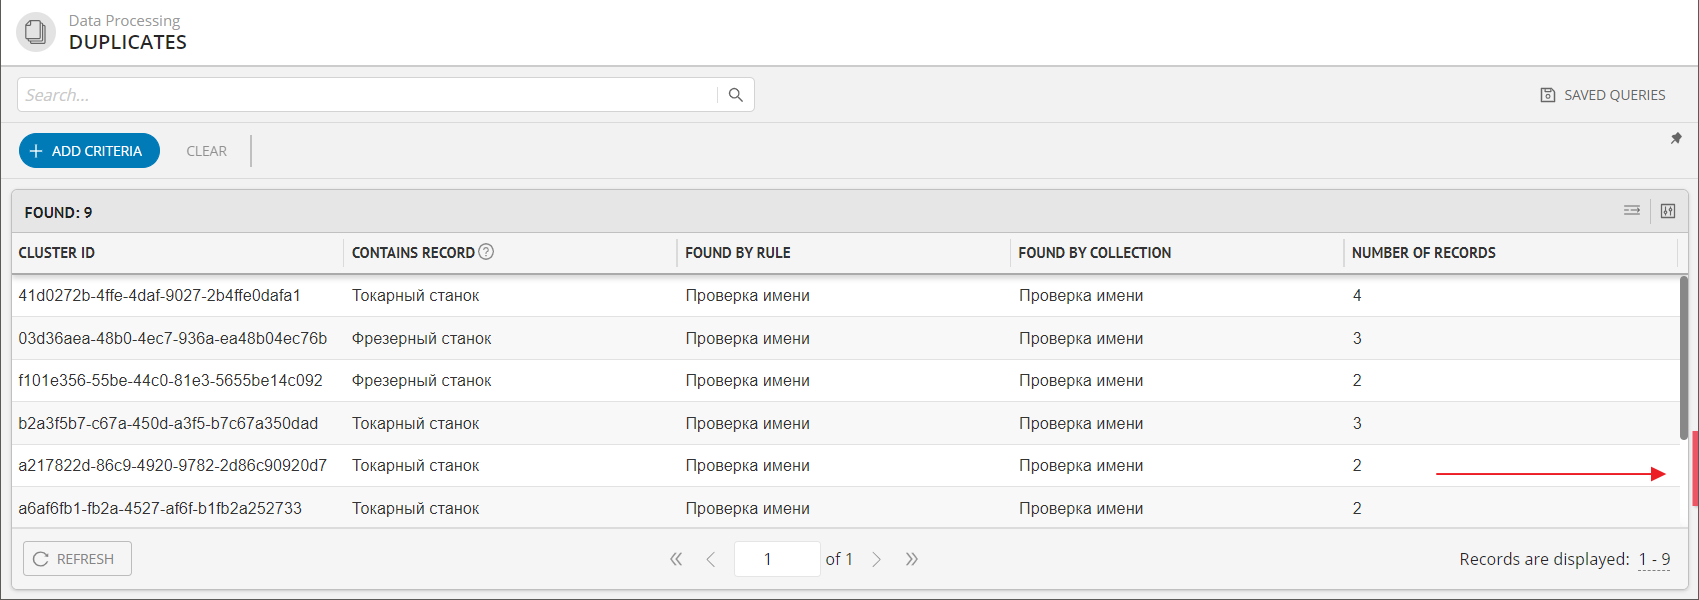
Figure 1. The area for the button to appear
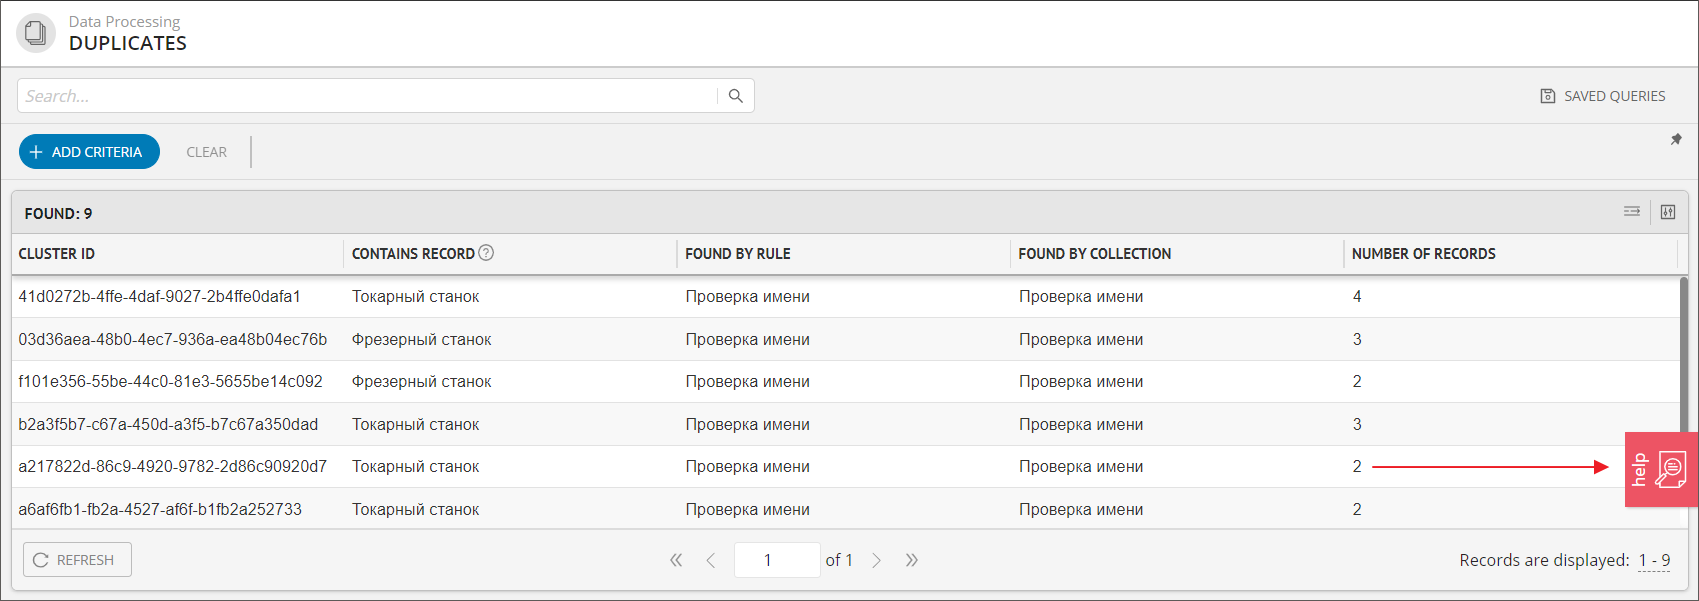
Figure 2. Help button
Install Online-help to Your Server
Installation on Nginx
Installing Nginx on CentOS 7:
Add the EPEL repository:
# sudo yum install epel-releaseInstall Nginx:
# sudo yum install nginxAllow HTTP and HTTPS traffic on the firewall:
# sudo firewall-cmd --permanent --add-service=http
# sudo firewall-cmd --permanent --add-service=https
Reboot the firewall:
# sudo firewall-cmd --reloadStart Nginx:
# sudo systemctl start nginxConfigure Nginx to autostart on system reboot:
# sudo systemctl enable nginxCheck the status of the Nginx service (it should be - active):
# sudo systemctl status nginx
Configure Nginx for local help:
Set up the Nginx configuration in the
/etc/nginx/nginx.conffile. In the server block, replace some of the code with:server { listen 80; server_name localhost; location / { root /usr/share/nginx/html/; index index.html index.htm; error_page 404 /page404.html; } }
Restart Nginx:
# sudo systemctl reload nginxCheck the status of the Nginx service (should be - active):
#sudo systemctl status nginxCompletely clean up the
/usr/share/nginx/htmldirectory.Copy the contents from the
mdmdirectory to the/usr/share/nginx/htmldirectory.The directory and file structure should look like this:
#ls /usr/share/nginx/html 6.10.9.0-EE index.html page404.html 6.10.0-EE - help version for the platform index.html - start page (link to url=/6.10.0-EE/index.html) page404.html - page 404 error page (link to url=/6.10.0-EE/content/404.html)
Go to
localhost:80to check if the help works.
Installation with Docker
Before you start:
Install Docker from official repository. See docs https://docs.docker.com/
Install Docker Compose (version 1.29 or upper).
Installation:
To deploy the help on the local server, archives are supplied to the client:
Archive with configuration docs-configs.zip. You can also download the archive below.
Archive with the help directory. The catalog has a name reflecting the release number and revision. For example, 6.10.0-EE.
Create a directory in any convenient place where the help will be stored. For example,
.../opt/docs/.Copy the contents of the docs-configs archive.zip to the created directory.
Copy the contents of the archive with the help directory to the directory .../site/mdm.
In
docker-compose.ymlspecify the path to the directory.../site/mdm. If necessary, change the ports. If several help sites are deployed, then their ports should not be repeated.In
.../site/mdm/index.htmland.../site/mdm/page404.htmlspecify the release number and revision so that the values correspond to the name of the help directory. If 6.10.0-EE is installed, then the same name should be in the files.Launch the container. At the first launch, all the necessary images will be loaded:
docker-compose up -d
Check the status of the container:
docker-compose ps
The help site will be available at http://localhost:8090/.
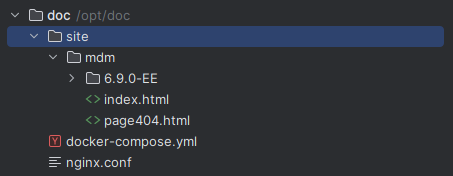
Figure 3. Directory structure

Figure 4. Container status
Contents of Main Configuration Files
docker-compose.yml
version: '3'
services:
nginx:
image: nginx:alpine
container_name: nginx-doc-mdm
restart: unless-stopped
ports:
- "8090:80"
volumes:
- /opt/doc/site/mdm:/usr/share/nginx/html
- /opt/doc/nginx.conf:/etc/nginx/conf.d/default.conf
nginx.conf
server {
listen 80;
server_name localhost;

location / {
root /usr/share/nginx/html/;
index index.html index.htm;
error_page 404 /page404.html;
}
}
index.html
<!DOCTYPE html>
<meta http-equiv="Refresh" content="0; url=/6.10.0-EE/index.html" />
page404.html
<!DOCTYPE html>
<meta http-equiv="Refresh" content="0; url=/6.10.0-EE/content/404.html" />
Changing Host for Integration with Product
The host address is configured in the customer.json file.
To change the host, specify in the WIKI_HOST parameter the address at which the online help is available.
Example:
"WIKI_HOST": "https://yourhost/",
If your host contains a port address, then it must also be specified.
As a result, links of the form will be formed https://yourhost/6.10.0-EE/index.html.
Enabling/Disabling Integration
Integration is managed by the customer.json file.
To enable integration, specify the host change, specify the value of the WIKI_ENABLED = true parameter, to disable = false.
Example:
"WIKI_ENABLED": true,