User Groups
User groups are used to configure access rights by combining different users into groups. Groups can also contain subgroups that inherit role settings from the parent.
The order of the child groups inside the parent group can be changed by holding the row of the desired group and moving it up/down.
Note
The "User Groups" section is available to work if the user is assigned a role with the User Groups right
Creating Group
To create a group:
Go to the "User Groups" section.
Hover the cursor over the row of the root group and click
 "Add nested group".
Enter the name of the new group and press Enter.
As a result of the action, the group settings screen will be displayed (Figure 1).
In the section "Main settings" fill in the basic parameters:
Display name. Obligatory. The name of the group to display in the interface.
Description. Additional description of the group.
Is external. The flag is set automatically if the group was loaded from an external system. External groups are not available for deletion.
Security data source. A drop-down list that specifies the authorization methods. Universe - an account created in Universe MDM; ldap - an account created through Active Directory. The authorization method can be hidden if the "External" flag is disabled.
Roles. Drop-down list of roles assigned to the group. Multiple roles can be selected.
Inherited roles. If the group being created is a subgroup, the cell will automatically fill it with the role it inherits from the parent group.
In the section "Users" click the
button in the upper right corner of the table and select users from the list to add to the group.As a result of the action, user rows will be displayed in a table with the label "Added".
To remove a user from the table, hover over the desired row and click
 "Delete".
Click
 Save in the upper right corner of the screen to apply the changes.
Editing Group
To edit a group:
Select necessary group from a list of existing ones.
Make changes.
If you delete a user from the table, the row will be marked with the "Deleted" label, while the changes will be applied. Press "Undo Deletion", if necessary.
Click
Save in the upper right corner of the screen to apply the changes.
Deleting Group
To delete a group:
Select the required group from the list of existing ones.
In the upper right corner of the screen, click
 "Delete".
Confirm the action.
When a parent group is deleted, all child groups are moved to the root of the hierarchy.
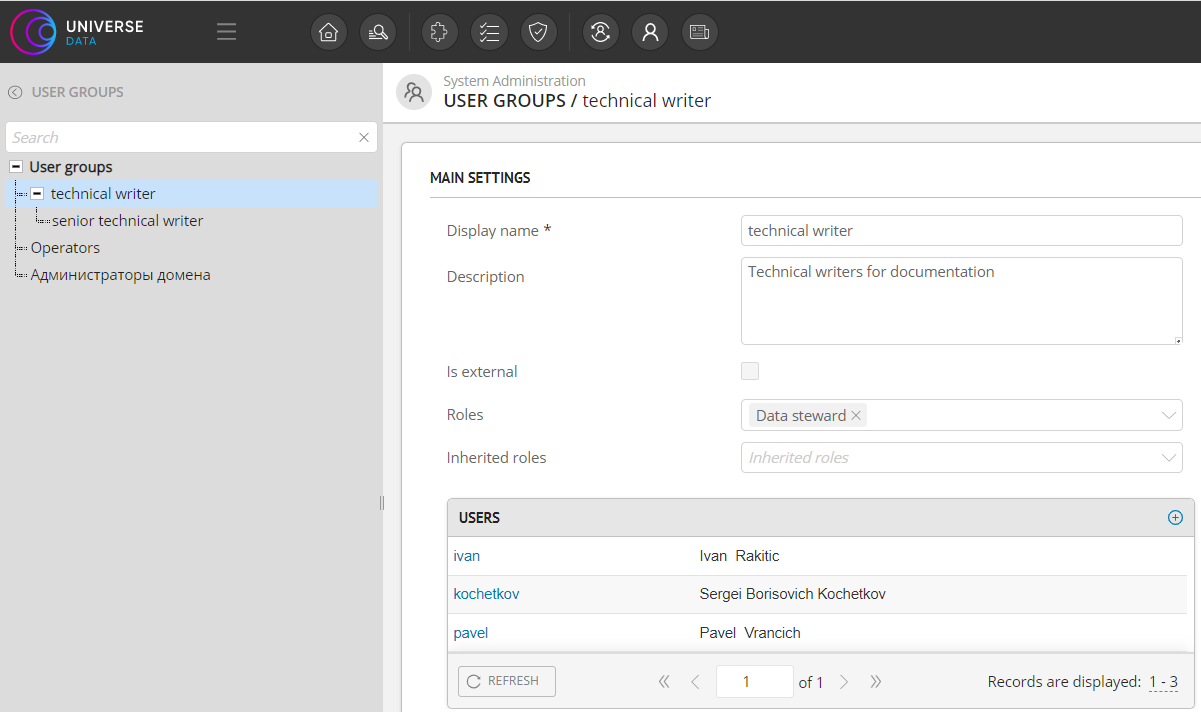
Figure 1 - Example of creating a user group