Creating Workflow
A workflow is a chain of actions (subprocesses) that describe the basic regulations and procedures of a company in a simple and structured form.
Universe MDM uses the BPMN 2.0 notation for creating and configuring workflows, which allows you to create graphical process diagrams, as well as to upload ready-made descriptions in xml format.
Work with workflows in Universe MDM is performed in the "Workflows" section.
Also see: Workflow Concept
Creating New Process
To create a workflow:
Enable the draft mode by clicking
 "Draft". Create new draft or open an existing one.
Make sure the "Workflows" tab at the top of the process list is active.
Click the
 "Create workflow" button located at the bottom of the list.
Select a type of process creation:
Upload file: select the desired process file to upload (.xml/.bpmn), enter the displayed process name and confirm the action.
Select template: select the desired template from the ready-made list, enter the displayed process name and confirm the action.
Fill manually: enter the basic parameters. Required: process ID (to be filled in automatically) and display name. If necessary, fill in additional parameters (will be available for editing later), then confirm the action.
A new workflow will be created. You can enter and edit the main settings on the right side of the screen. For a detailed description, see Settings panel. In the main part of the screen you will see the tabs:
Diagram. For a detailed description, see Diagram editor.
Indexed variables. Allows you to add one or more variables that will be used in the process. For a detailed description, see Workflow Variables Assignment.
Mapping (for Enterprise Edition only). Allows you to assign a worflow to an entity/reference set. To do this, add the required entities/reference sets, which should trigger the workflow when they are changed. Triggers can be specified in the trigger condition. This allows you to create a process for a specific action. For example, launch only when recording is restored.
Click Save in the upper right corner of the screen.
Click
 "Publish Workflow Draft" button at the bottom of the process list. Select publishing method: simple or with priority.
Tip
Restriction: It is not recommended to assign a business process to a entity that has an "Contains" relation. If a business process is configured for such a entity, and an record with the "Contains" relation is created, then the publication attempt will fail. Support for creating records with the insertion of "Contains" relation through the business process is planned in future releases. Workflows assignment is only available in Enterprise Edition
A download of the process diagram in .bpmn format is available using the
 "Download Diagram" button in the upper right corner of the screen. When exporting the diagram, the basic process settings "Only for manual run" and "Description" are not uploaded
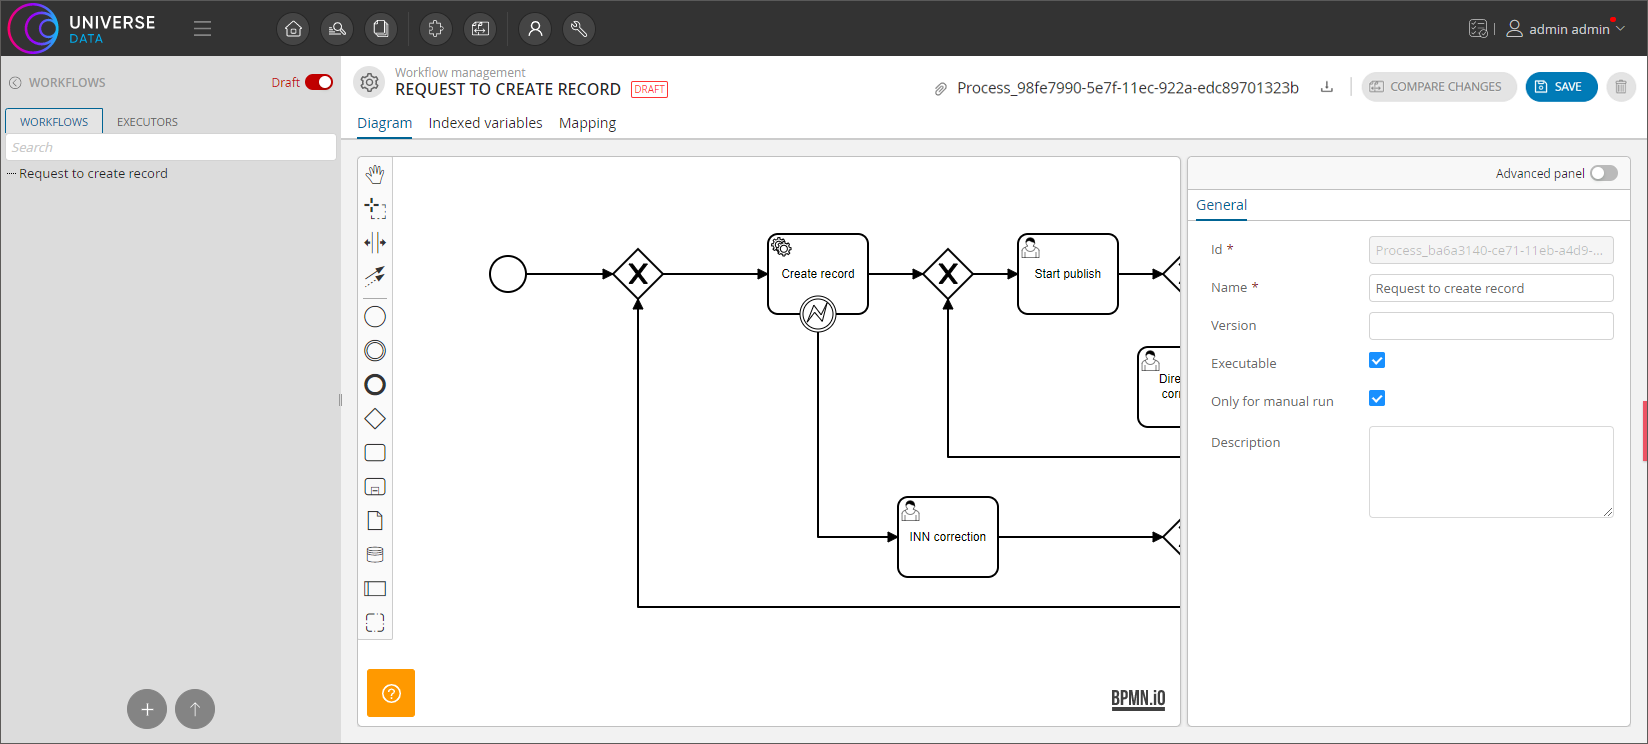
Figure 1. Adding new process (example of displaying for Enterprise Edition)
Standard Edition Limitations
Note
In the Standard Edition, business processes are not tied to a record and implement the processes of creating applications for adding records to the system
The Standard Edition does not have a business process start when publishing a draft record.
The Draft publish service pack handler is available in manual (piece-by-piece) mode, and can be used to publish any draft when there is a draftId variable in the process/task. The variable can be specified by draftId when executing a task or when starting a process.
Apply at the start of the process:
In the process properties, enable the Enable manual launch (properties are available when no process block is allocated).
Select a block on the diagram Starting event.
Enable Advanced panel.
On tab Form add field draftId.
Id name of the process variable: draftId
Type: long
Name: Draft ID
As a result, each time the process is started, it will be necessary to specify the Draft ID for the published draft.
Apply when creating a specific task in the process:
In the process properties, enable the Enable manual launch (properties are available when no process block is allocated).
Select a block on the block Task.
Enable Advanced panel.
On tab Form add field draftId.
Id name of the process variable: draftId
Type: long
Name: Draft ID
As a result, each time a task is approved, it will be necessary to specify the Draft ID for the published draft.
Indexed Variables
Variables allow you to organize interaction between different tasks within a single process instance, search for process instances, and organize different logic on the process diagram.
Variables store all information about a particular instance of the process. For example, about the process model (schema + handlers + variable model), about the initiator, the start date of the process, etc.
The system provides a standard set of variables that are automatically added to each new process. Variables can also be created/edited in the settings panel of service tasks and various event listeners. A description of the standard variables can be found in the StandardWorkflowVariables.java file.
Download StandardWorkflowVariables.java
Note
Exception: Time and Timestamp variables cannot be used temporarily when customizing a workflow.
The type of the indexed variable must always match the type of the form field for the workflow block that uses the variable. For example, a variable with type Number (numeric) will not be able to validate a task form field with type long because it is an integer.
Creating and Adding Variables
In the "Indexed Variables" tab of the "Workflows" section only the announcement of variables is available.
To apply variables, you must have the workflow get information about the variables. This can be done in several ways:
Fill out a form with the variable (specify the value of the variable) at one of the workflow steps in the "Forms" tab. The tab is displayed to the user when the user selects a specific task type (such as a start event or user task) in the basic or advanced settings panel.
Create an event listener in the process schema in the "Listeners" tab (available in the basic or advanced settings panel). The listener will complete the value of the variable.
Use your own logic in a custom process via a custom java class.
Search of a workflow instance can be done on variables. To make a variable searchable, it must be added to the list of variables ("Indexed Variables" tab), giving it a name and specifying the appropriate type.
To create a variable:
Make sure that the "Indexed Variables" tab is active.
Click
"Add Variable".Enter the Name and Display Name of the variable.
Select the variable type from the drop-down list and click "Save" in the upper right corner of the screen.
Variables that are not configured as search variables (i.e. not added to the list in the "Indexed Variables" tab) will not be returned when a specific task or process is received, but will be stored:
In the workflow diagram,
In service tasks,
In event listeners,
In the BPMN diagram.
Assigning Workflows
In the "Mapping" tab of the "Workflows" section, you can assign the created process to a specific entity/reference set.
To assign a process:
Make sure that the "Mapping" tab is active.
Click the
"Add" button and select the desired entity/reference set to which you want to assign the process.Set the run condition: Create record, Restore record, Update record, Restore period or All (default).
Click "Save" in the upper right corner of the screen.
To delete an assignment:
Hover the cursor over the assignment line and click the
 "Delete" button, which will be displayed at the far right end of the line.
To delete the entire list of assignments, click the "Delete" button in the upper right corner of the table and confirm the action.