Diagram Editor
Сreating Diagram
To create the workflow diagram:
Make sure draft mode is enabled.
Make sure the "Workflows" tab at the top of the processes list is active.
Create a new workflow and select the type of process creation - Fill manually.
Make sure the Diagram tab is active.
This will automatically create an empty diagram in .bpmn format.
Build the workflow diagram using the visual editor. The process looks as follows:
Add start event. To do this, click the
 start event icon and then click the work area. When the element is selected on the diagram the Hint with a brief description of the event will be available at the bottom of the work area.
Add new event
 . Two methods are available:
Select an event in the left panel.
Highlight the desired event in the diagram. From some types of events you can create a new event by clicking on the appropriate icon, and the connection will be automatically built. It is also available to change the type of the selected event by clicking on the
 "Change type" icon.
Add event name, if this is provided by the event type (e.g., task, subtask, group).
For events that are processing by users, enable the appropriate setting. Highlight the event, click the
Change type and select the "User task" type.For events that should be processed by service tasks, enable the appropriate setting. Highlight the event, click the
 Change type and select the "Service task" type.
Add connection between the events. Two ways are available:
Click the
 "Global Connect" icon in the left panel. Select the event from which the connection will start and draw a connection line to the desired event.
Highlight the event in the diagram. Click the
"Connect" icon that appears and draw a connection to the desired event.
Add end event of the process
.Configure the diagram settings in the panel, located on the right side of the workspace. The settings change for each highlighted event.
To save the diagram, click the Save button in the upper right corner of the screen.
Warning
Diagrams containing the "Pool/Participant" element are not supported and their import is prohibited.
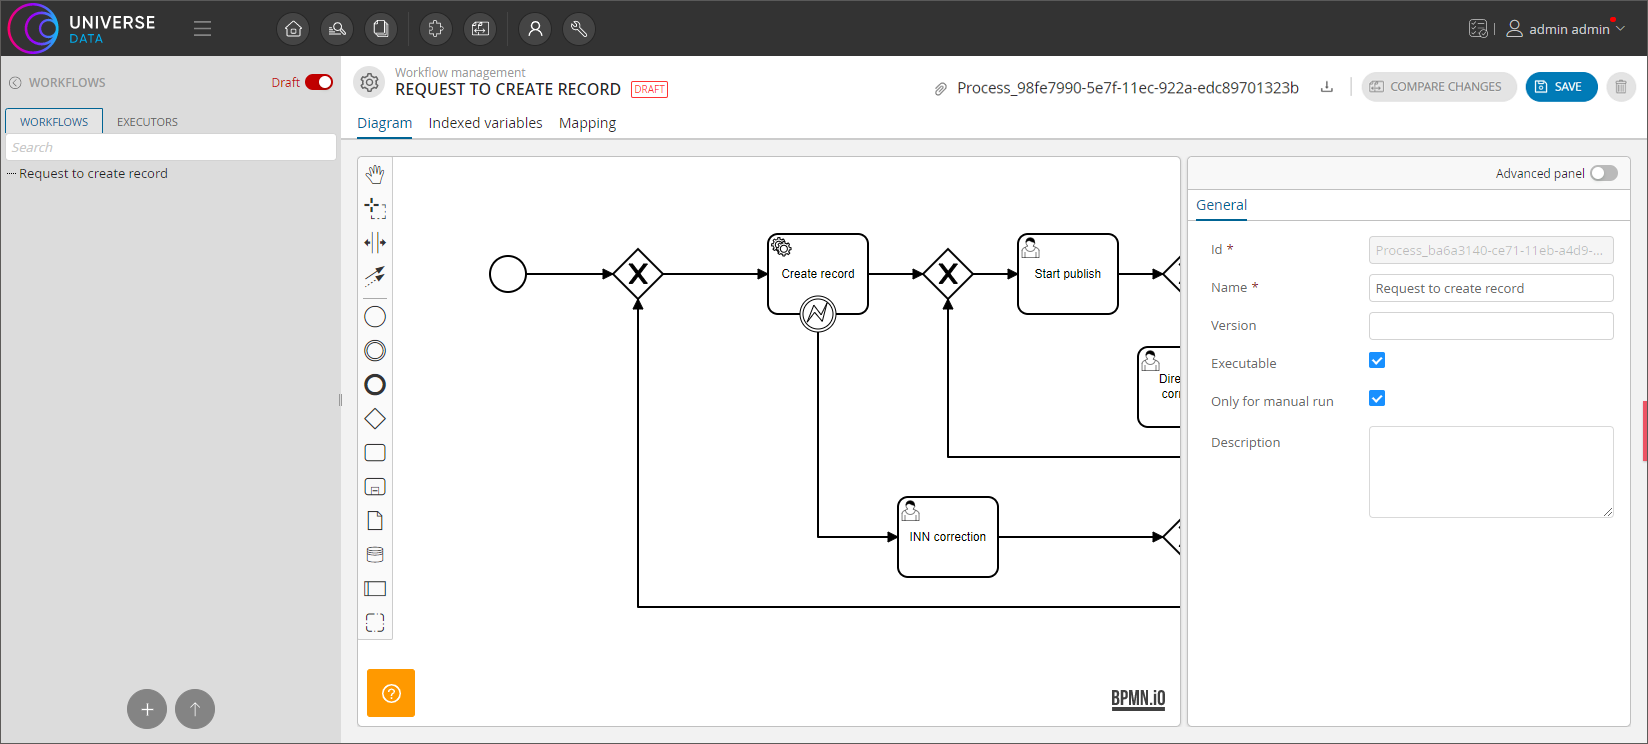
Figure 1. Diagram creation (example of displaying for Enterprise Edition)
Configuring Workflow Step
During the creation of the workflow diagram, you can also configure the parameters of each of the blocks User/Service task, Start/End event, etc.
To configure the workflow step:
Select the required block. For example, "User task" block.
As result right panel will be changed.
Customize the General tab. If necessary, change the block ID, block Name, availability for users and roles, etc.
Customize the Form tab. If you need to add a form, then follow these steps:
In the "Fields" header, click "Add".
Select the added form from the list.
Specify the Name of the field ID. Use only Latin letters.
Select the Type of form field. The type is related to the validation of the form field.
Specify the Label.
Specify the Default value.
Optional. Add Validation. The validation type must match the type of the form field: required and read-only is suitable for all types of fields, minlength and maxlength for string, min and max for numeric. After selecting the type, specify the value for validation.
Optional. Add Properties: custom properties in the form of "key-value".
Set up the Listeners tab. If necessary, create listeners and execution lesteners.
After you finish working with tabs, go to the next block or continue working with the workflow diagram.
To save the diagram, click "Save" in the upper right corner of the screen.
Note
If you have any difficulties, use the official Camunda documentation on the fields of filling out the form