Assigning Matching Rules
"Rules Assignment" tab links previously configured matching tables and rule sets to specific attributes of entities/reference sets (Figure 1).
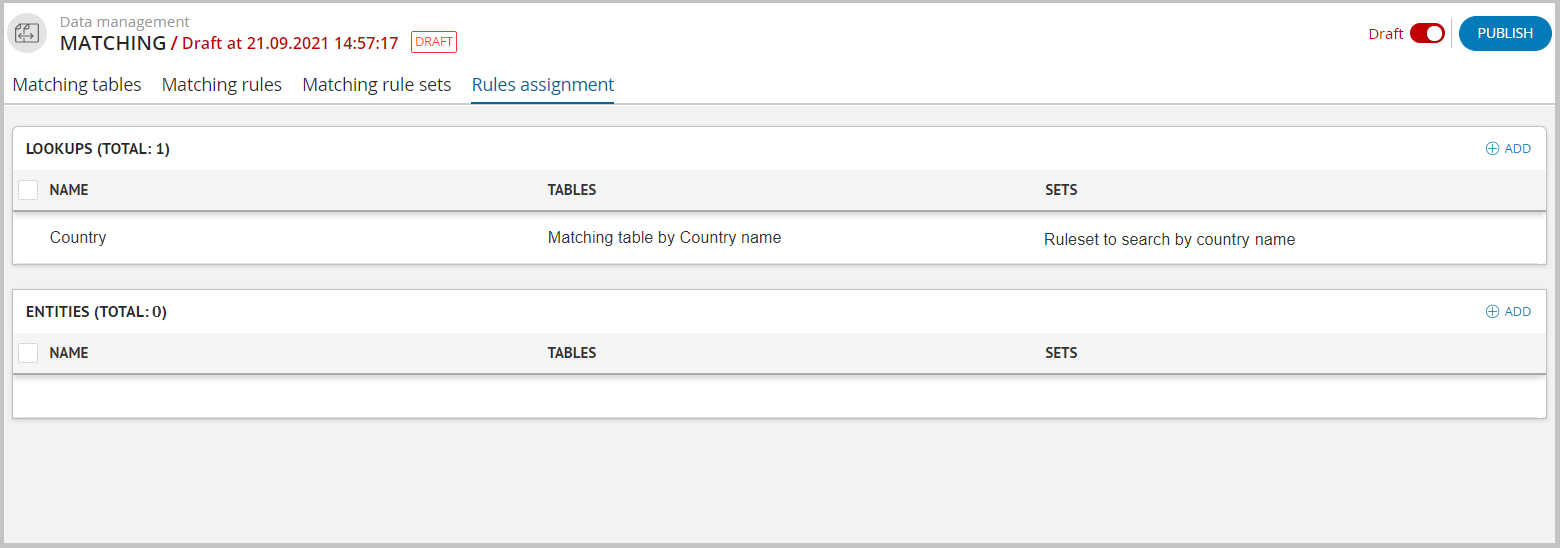
Figure 1. "Rules Assignments" tab
Rules Assignment
To assign matching rules:
Make sure that the draft mode is enabled and the draft is selected.
Click the "+ Add" button and select the necessary entity/reference set from the list of existing ones.
To assign rules to the entity - the button to the right of the Entities header, to assign rules to the reference set - to the right of the Reference Sets header.
The button is disabled when all available matching tables (matching rule sets) are already used.
As a result of the action, a drawer with assignment parameters will open (Figure 2).
In the Table field, select a matching table from the list of previously created tables, to which a set of rules will be attached.
When adding a matching table, the first available set of rules will be automatically selected (to limit the possibility of saving a table without a set). If the table contains only one rule set - it will not be available for deletion, the delete button will be inactive (Enterprise Edition only).
If the table does not contain rule sets - it will not appear in the drop-down list (Enterprise Edition only).
As a result of the action, the list of table matching columns and the set of rules that can be assigned to this table will be displayed below.
For each column, select the desired attribute or relation of the entity/reference set. To do this, click on the text field on the right, which specifies the path to find the attribute/relation and select from the list of available ones.
If necessary, you can change the text view by clicking the "Change view" button. The path for finding the attribute (example for an entity) should have the form: »Entity:Entity name:{}.Attribute name".
Changing the order of the rule sets is available using the
 button. Press and hold down the button to drag the set to the desired location (Enterprise Edition only).
Next, click the "Add" button below.
As a result of the action, the "Rule Set" field will appear. Select the required rule set from the drop-down list of available sets for this table.
If necessary, use the "Auto Consolidation" switch at the top of the table to activate automatic consolidation of duplicate records of the selected entity/reference set, which will be performed when creating/modifying a record via the user interface.
To add another table, click the
 "Add" button to the right of the Assignments header. Use the "Delete" button to erase unnecessary tables.
Click "Save" after filling in all the parameters and publish the draft.
Warning
Even if a set of rules is not assigned to the entity, but is added to the operation "matchingJob", this set of rules will still be processed when the operation is performed. This is due to the fact that matching rules work with an abstract matching table, and this should be taken into account when setting up matching rules
Deleting Assignment
To delete an assignment:
Make sure that the draft mode is enabled and a draft is selected.
In the leftmost column, mark the row next to the required entity/reference set (one or more).
Click the "Delete Assignment" button located in the upper right corner of the tab.
Confirm or cancel the action.
Tip
Deleting assigned matching rules is done in reverse tabs order: Rules Assignment → Matching Rule Sets → Matching Rules → Matching Tables
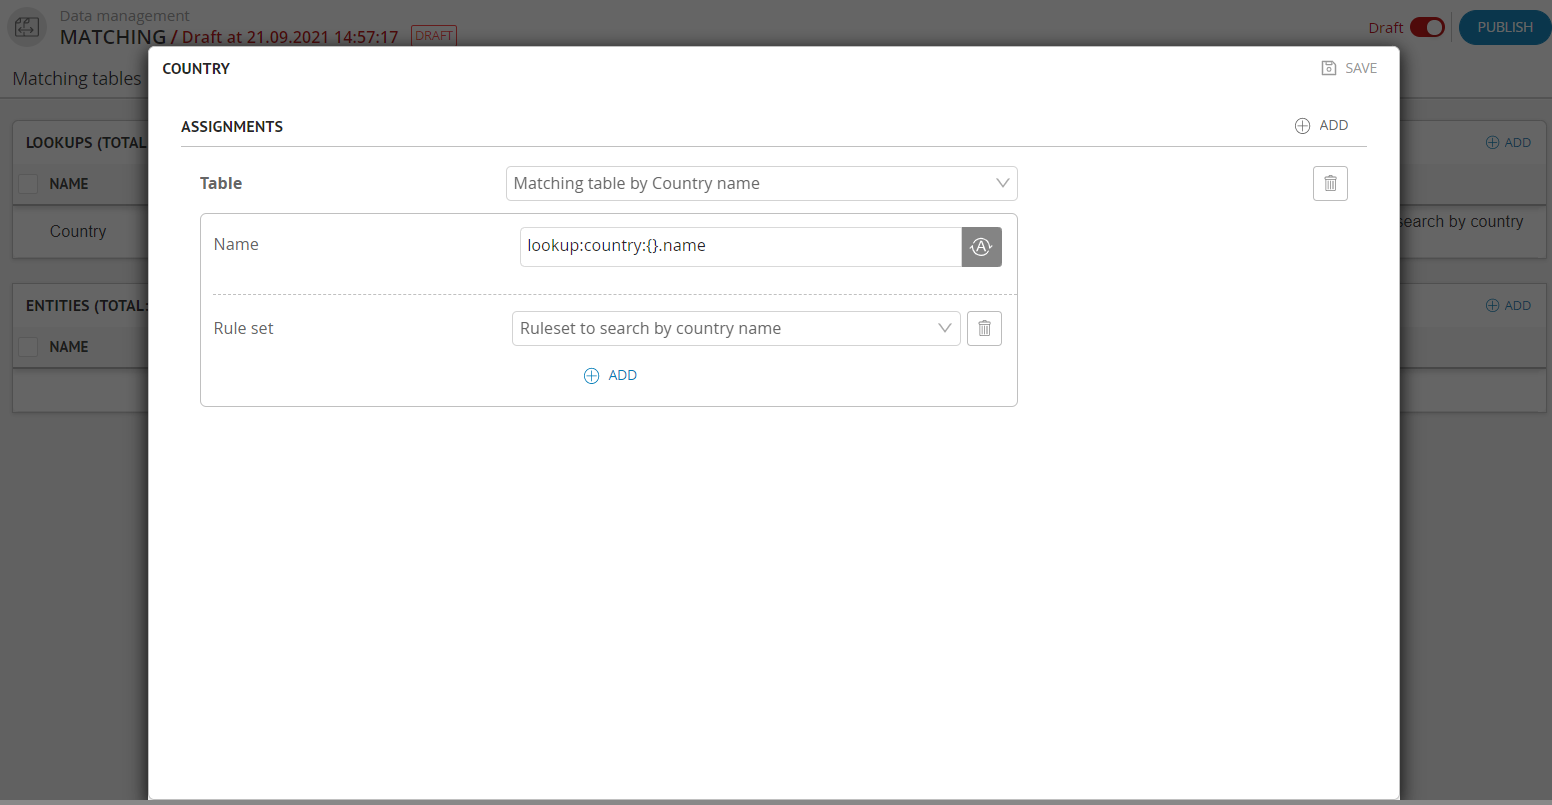
Figure 2. Parameters of Rules Assignment.